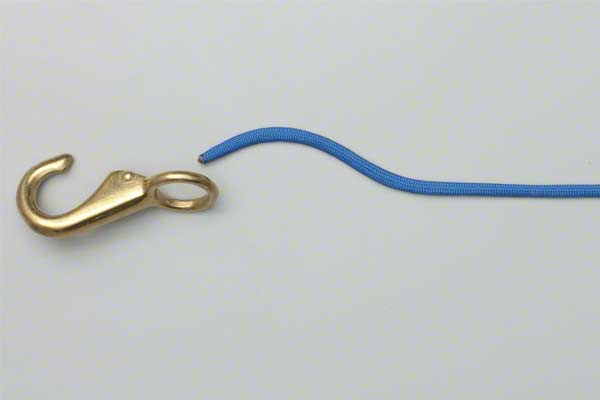
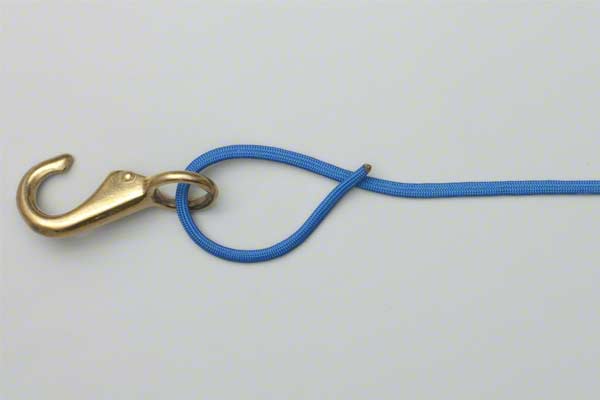
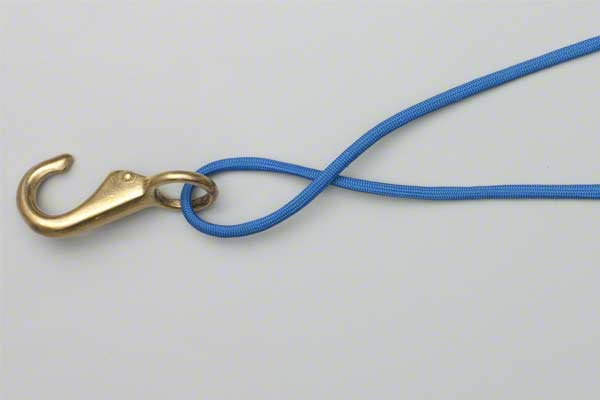
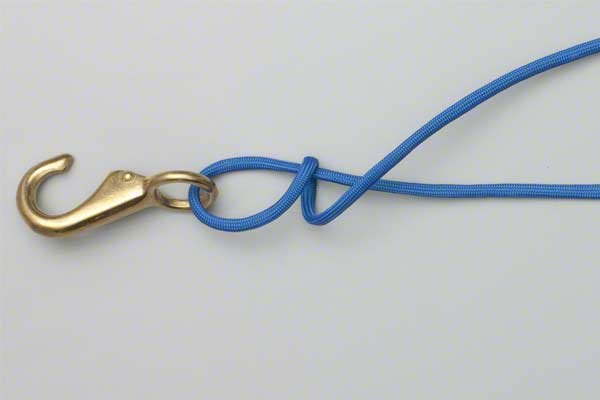
Improved Clinch Knot Tying
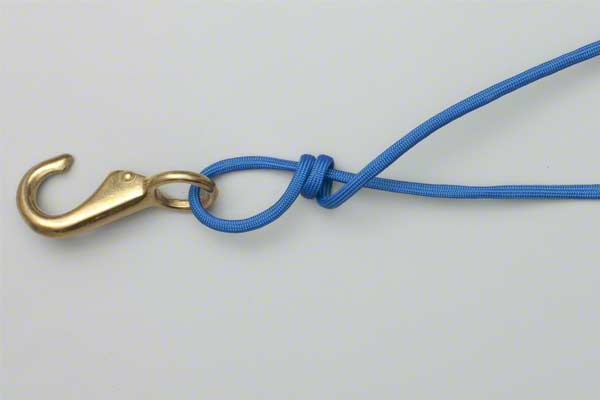
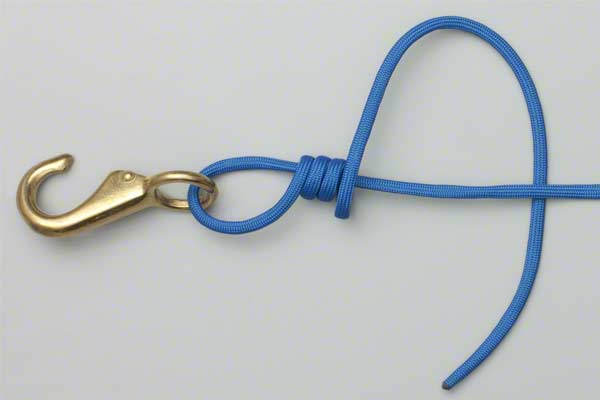
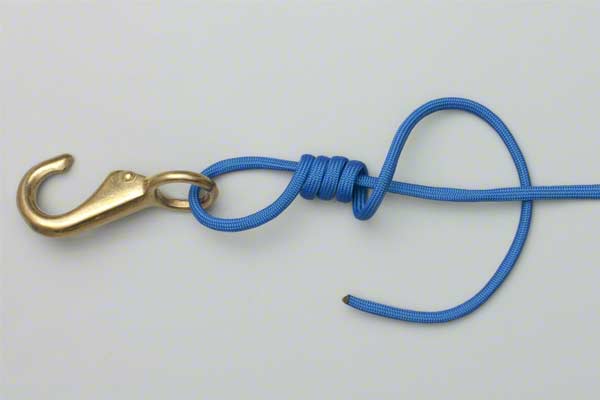
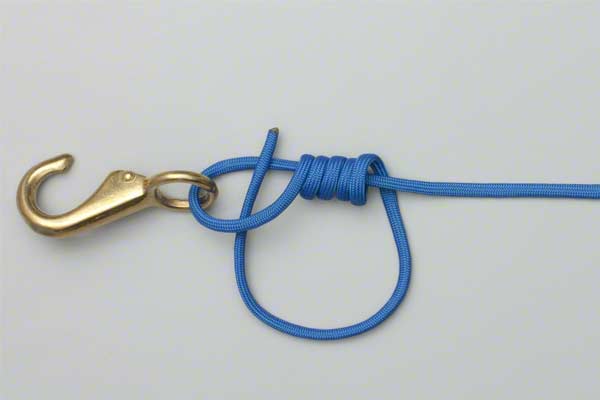
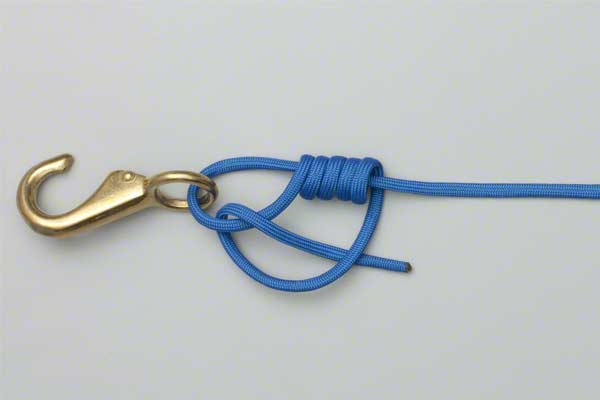
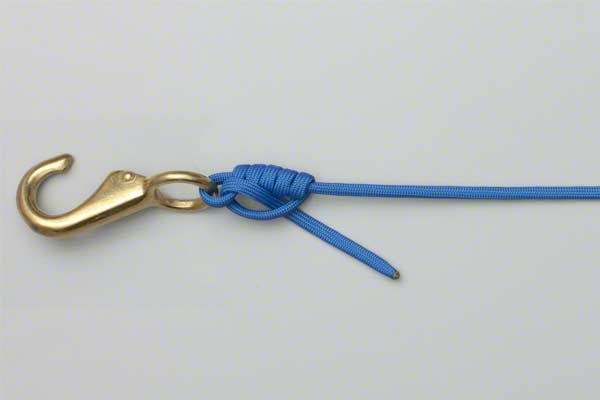
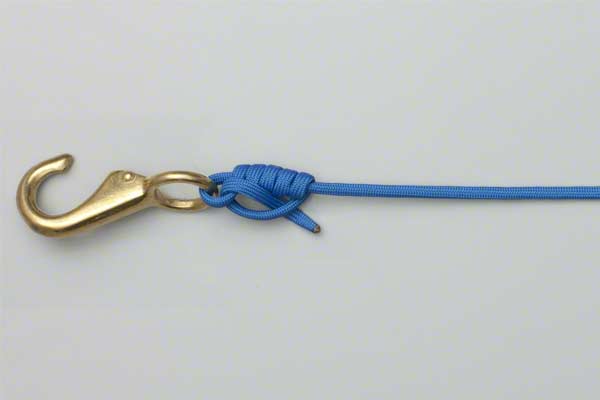
Pass the end of the line through the eye. Wrap it around the standing end about five complete turns. Pass the end back through the loop beside the eye. Then pass the end under the final turn. Tighten the knot and trim the end.
Improved Clinch Knot Details
Uses: The Improved Clinch knot is one of the most widely used fishing knots. It provides a good method of securing a fishing line to a hook, lure, or swivel. The "improved" version shown here includes an extra tuck under the final turn (step 9). It is commonly used to fasten the leader to the fly. Because it is harder to tie in heavier lines it is not recommended if you are using over 30 lb test line.
Tying it: Wind the loops in a neat spiral round the standing line and hold the loops under your fingers as you wind the line on. Although five or more turns are recommended, with heavier lines this may be reduced to four.
Pulling the Knot Tight: When lubricated and pulled tight, the knot changes its structure. Pulling on the line forces the wrapped turns to redistribute the twists so that the inner strand becomes an outer wrap (not illustrated in the animation using rope). When tightened the tag end is actually gripped closely against the hook.
Alternative: Another method of tying it is to hold the Line and Tag End in your fingers and, with the other hand, rotate the hook or lure to obtain the desired number of twists.
Advantages: The Improved Clinch knot is regarded as a fisherman's reliable standby. It is particularly suited for attaching a small diameter tippet to a heavy wire hook. The extra final tuck improves your chances of holding a strong fish.