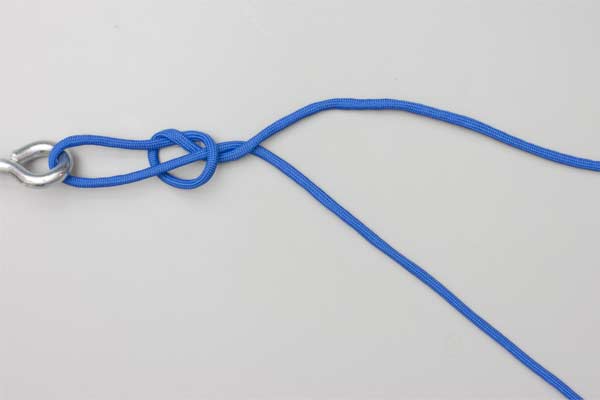
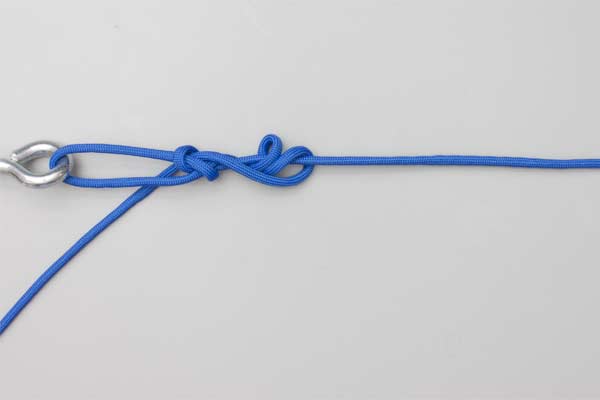
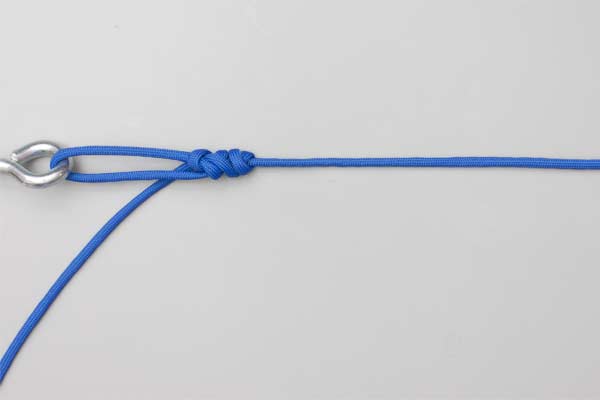
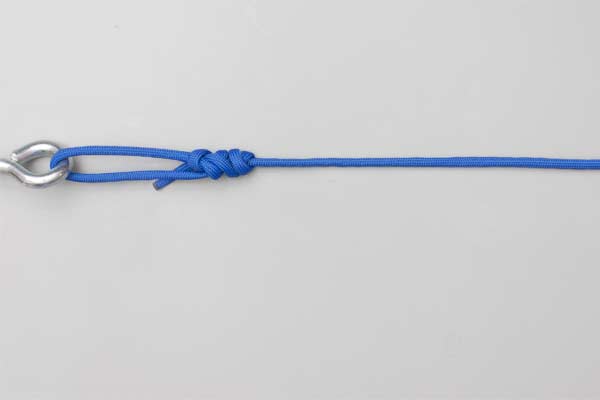
Non-Slip Mono Knot Tying
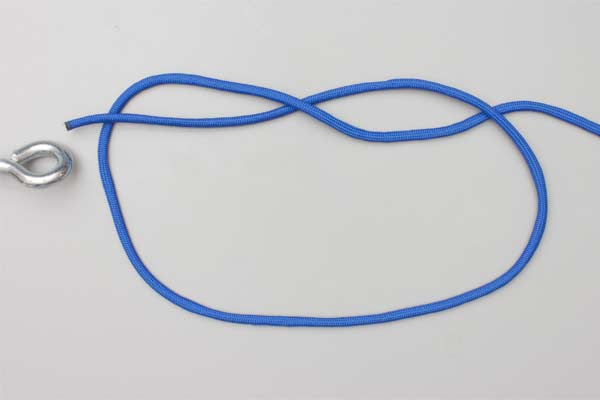
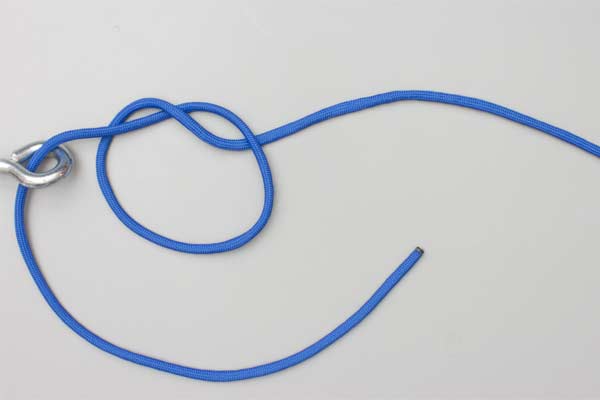
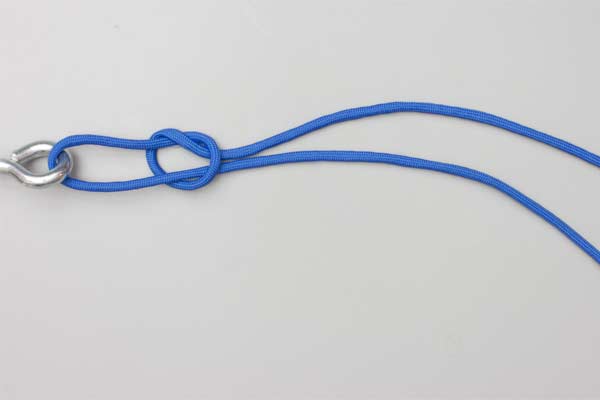
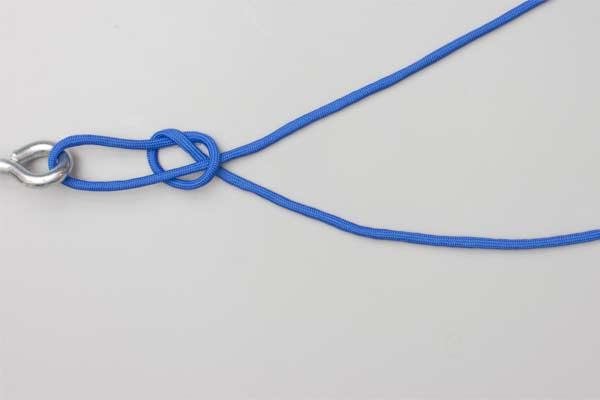
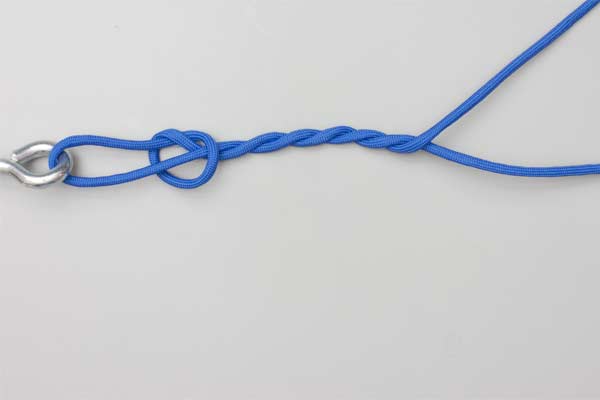
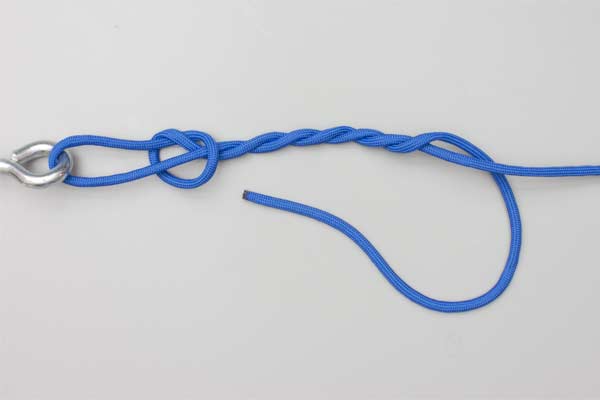
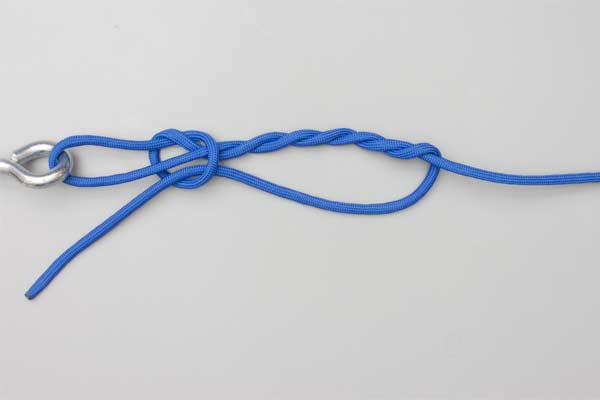
Tie a loose overhand knot and pass the tag end through the eye, then back through the overhand knot. Wrap the tag end around the standing end about five times and back through the overhand knot. Lubricate, tighten, and trim the end.


Non-Slip Mono Knot Details
Origin: The Non-Slip Mono Knot is a higher strength version of the original Homer Rhodes Loop Knot where the tag end was only hitched once around the standing line. The Non-Slip Mono was developed by Lefty Kreh during his series of tests to create a strong loop knot. It was then incorporated into the book "Practical Fishing Knots" which he co-authored with Mark Sosin. Accordingly it is quite often known as Lefty Kreh's Loop Knot.
Purpose: The Non-Slip Mono makes a very strong fixed loop in the end of the line. Because the loop doesn't grip the lure, it makes a flexible attachment and allows a more natural action.
Transformation: The Non-Slip Mono undergoes a transformation as it is tightened. The outer short-end wrapping turns become internal and vice versa.
| 6 - 8 lb test | 7 |
| 8 - 12 lb test | 5 |
| 15 - 40 lb test | 4 |
| 50 - 60 lb test | 3 |
| 60 lb plus test | 2 |
Number of Turns: The recommended number of turns depends on the line strength shown in the table:
Tying it: The size of the loop must be adjusted while the turns are still loose. Once tightened the size of the loop is fixed.
Advantages: The Non-Slip Mono is fairly easy to tie. Lefty Kreh discovered that the knot retains most of the line's rated strength - so much so that in some of his tests the strand broke rather than the knot. Another advantage is that the tag end faces the hook "...so it doesn't catch grass and other things on the retrieve...." (Lefty Kreh e-mail, 2012)