Rapala Knot Tying
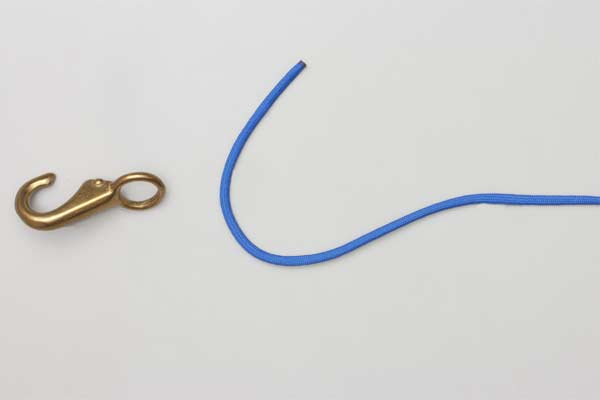
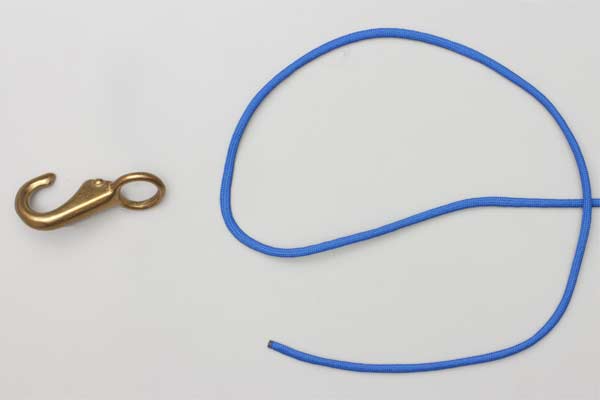
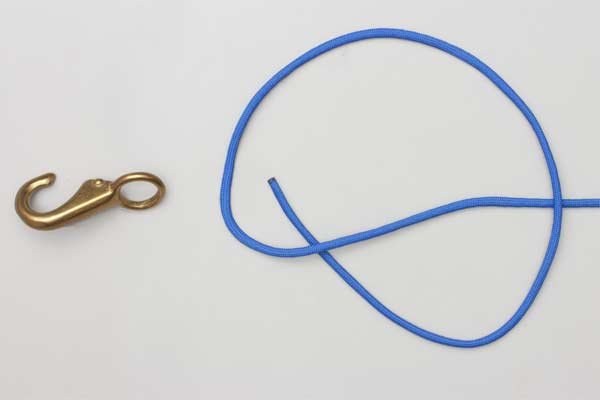
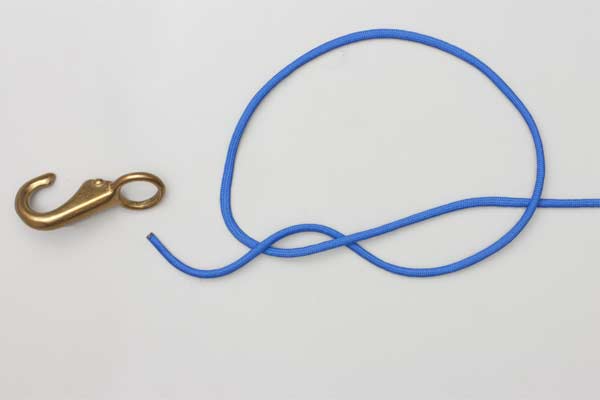
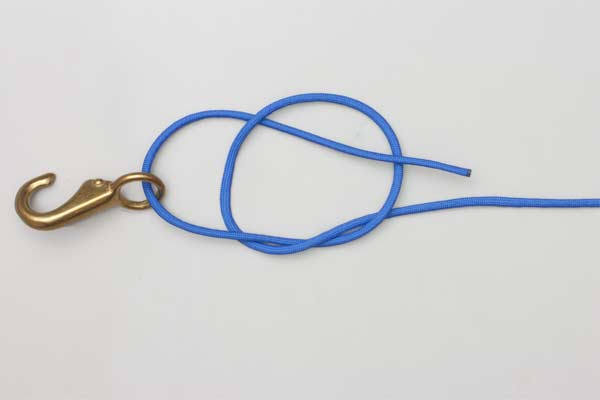
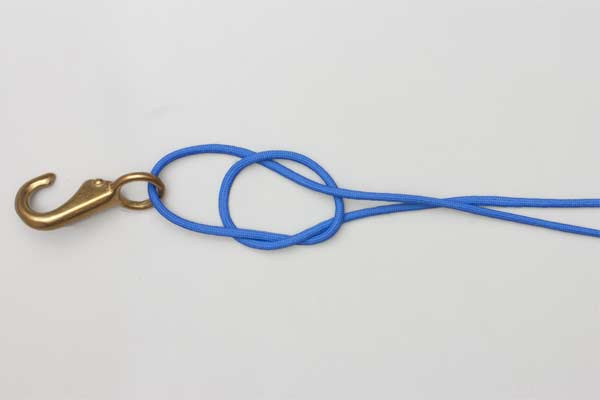
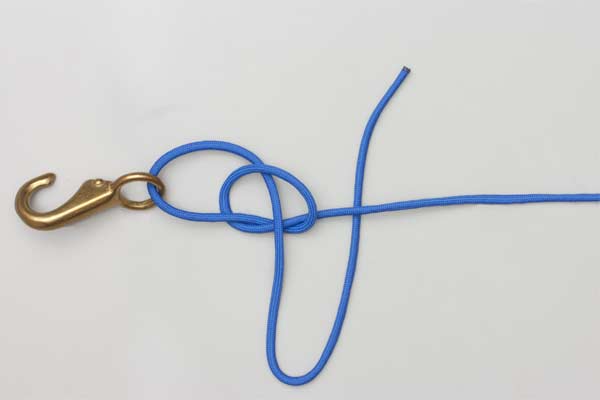
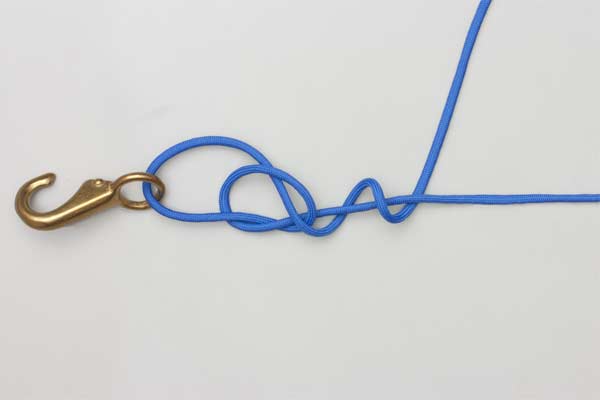
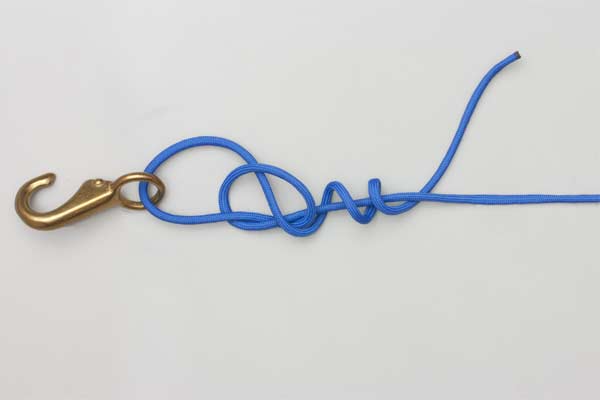
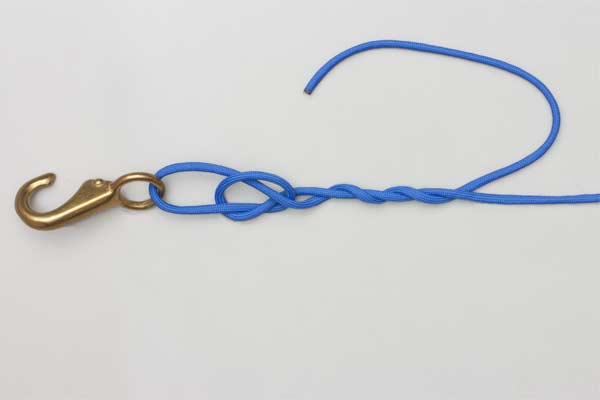
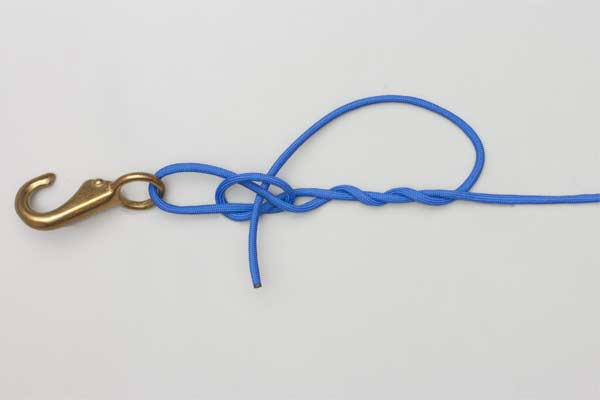
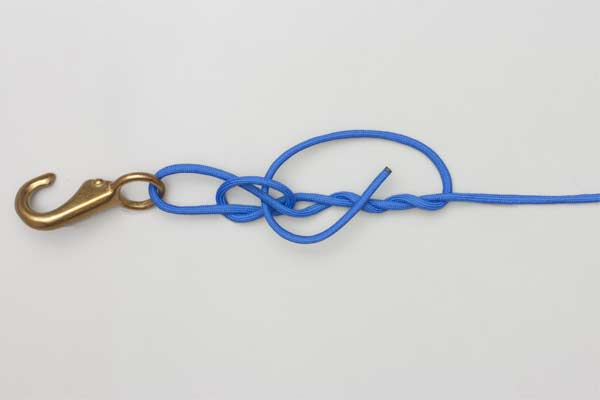
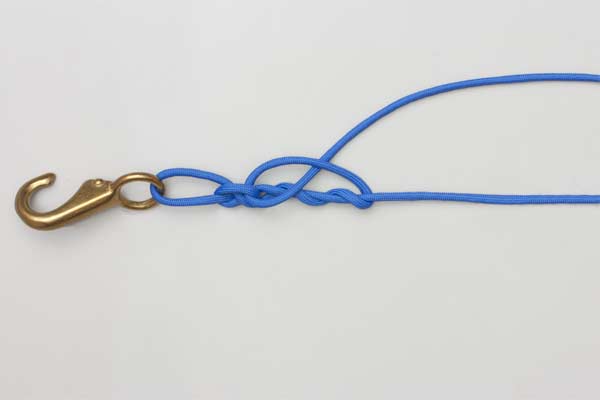
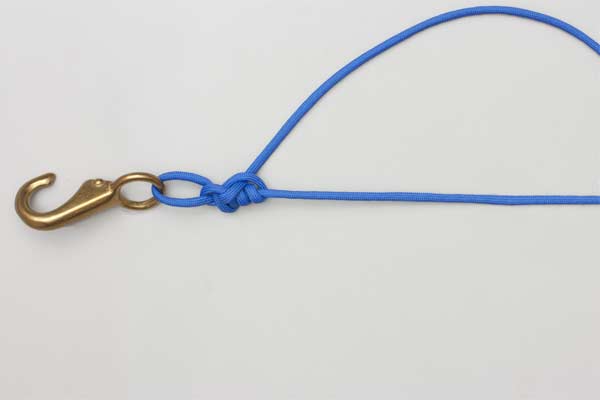
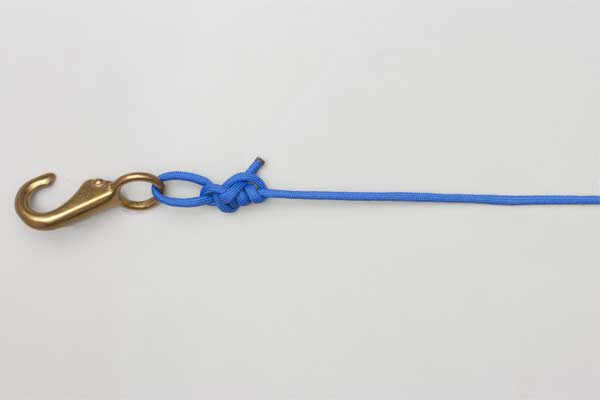
Form an overhand knot in the line. Pass the tag end through the eye and back through the overhand knot. Wrap the end three times around the standing end. Pass the end back through the overhand knot and then through the loop just formed. Lubricate and tighten the knot. Trim the end.


Rapala Knot Details
Uses: The Rapala Knot is a non-slip loop knot usually tied directly to the lure. The Rapala brothers recommended it for use with their Rapala lures as providing a loop that allowed the lures to move freely and naturally.
If a swivel or leader is essential, it is best to choose the lightest tackle possible to allow the lure to move with a natural motion.
History: I am indebted to Lefty Kreh for his history of this knot: "The Original Rapala Knot showed one turn around the main line with the tag end then one pass through the Overhand." Kreh tested it and found that it was not particularly strong but he markedly improved it by adding additional turns around the main line. This was the basis for his Non-Slip Mono Loop. Years later the Rapala brothers modified their description to add these extra turns as well as the final tuck under the tag end. Kreh then tested this version and found that the final tuck made it harder to tie and added no strength to the Non-Slip Mono.
Tying it: A long enough loop should be left to ensure that the lure is not gripped.
Advantages: The advantage claimed for this knot is that it allows the lure to move naturally. It is also claimed to retain most of the line strength - and this might be expected as the structure of the knot passes the force to the loop via a wrap in the center.
Disadvantages: The tag end faces away from the hook and therefore has a greater tendency to catch grass, etc., during retrieval then the Non-Slip Mono (Lefty Kreh e-mail, 2012).