In the world of technical crafts, few things are as vital yet overlooked as the integrity of a connection. Whether you are scaling a granite face using advanced rope knots or repairing a vintage lamp in your workshop, the principles of tension and security remain the same. One such specialized technique is the Underwriter’s Knot. While it may not be the first thing that comes to mind when discussing outdoor rope techniques, it shares the same DNA as the hitches and bends used by arborists and sailors: it is designed to manage force and protect a vulnerable point.
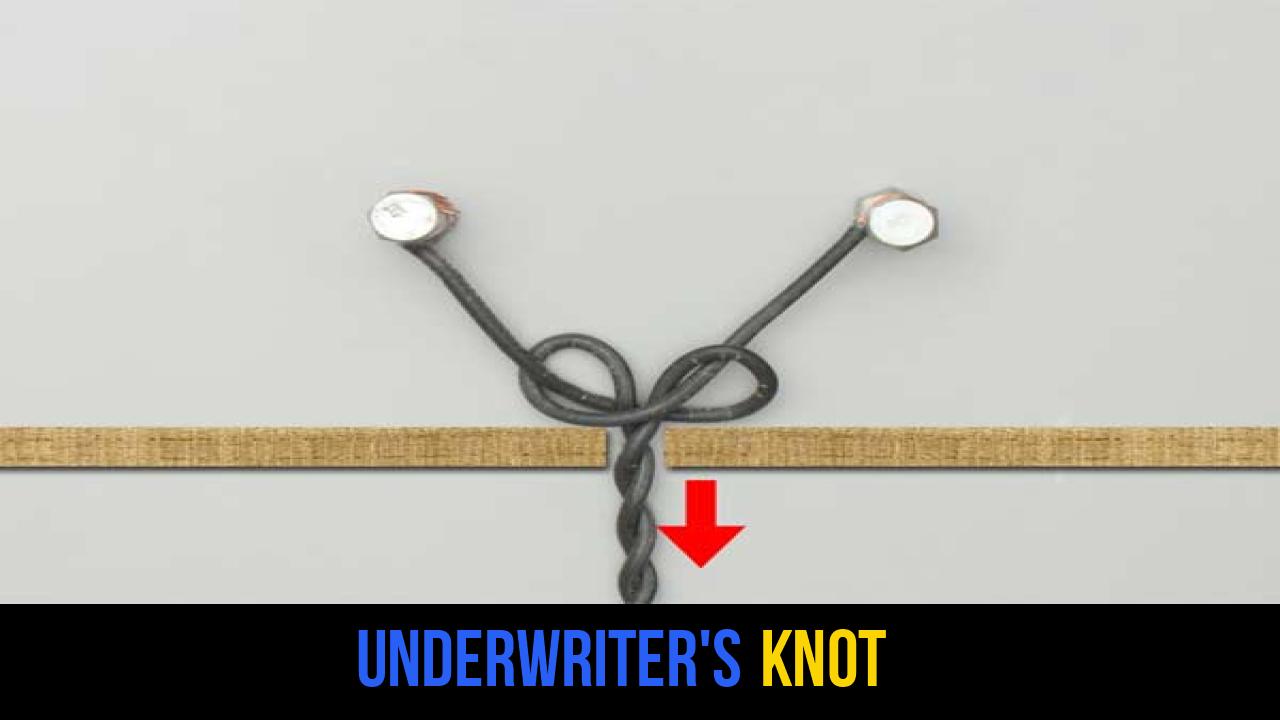
The Underwriter’s Knot is a functional, structural knot primarily used in electrical applications to provide strain relief. By creating a mechanical barrier within a plug or socket housing, it ensures that if a cord is accidentally jerked or pulled, the tension is absorbed by the knot against the housing rather than being transferred to the delicate terminal screws. This prevents short circuits, fires, and mechanical failure.
As an expert in technical gear and outdoor safety, I have seen how the mastery of small, specific knots can prevent catastrophic failures. In this guide, we will explore the nuances of this knot, the materials required to execute it perfectly, and how it fits into the broader lexicon of essential cordage skills.
Alternative Names: Strain Relief Knot, UL Knot, Fireman’s Electrical Knot, TP Knot.
What Is an Underwriter’s Knot?
The Underwriter’s Knot is a specific type of stopper knot or "strain-relief" knot. Its primary definition is a knot tied in a two-conductor wire (like a lamp cord or a lightweight extension cable) before it is attached to its terminals. The "Underwriter" in the name refers to the Underwriters Laboratories (UL), an organization that sets safety standards for electrical products. For decades, the UL has recommended or required this knot in certain types of electrical assemblies to ensure consumer safety.
Practical Uses
While its most common home is inside a light socket or an electrical plug, the logic of the Underwriter’s Knot extends to any situation where a two-strand cord needs to be secured against a pull.
- Electrical Repair: Essential when replacing plugs on household appliances or repairing lamp sockets.
- DIY Electronics: Used in hobbyist projects to ensure that internal wiring isn’t stressed by external movement.
- Industrial Maintenance: Applied in temporary lighting setups where cables are frequently moved and subjected to tugging.
- Outdoor Gear Maintenance: While not a climbing knot, the principle of strain relief is used in maintaining powered outdoor equipment, such as portable generators or outdoor lighting arrays.
By understanding this knot, you are not just learning a "wire trick"; you are mastering a fundamental concept of rope knots: the redirection of force.
Materials and Tools Needed
To properly tie an Underwriter’s Knot, you need more than just the cord itself. Precision is key to ensuring the knot fits within the designated housing.
1. Two-Conductor Wire
Typically, this is "SPT-1" or "SPT-2" wire, commonly known as zip cord or lamp cord. In an outdoor context, this might be a heavy-duty rubberized cord for power tools. The wire must be split (separated) for several inches to allow enough length for the loops.
2. Wire Strippers
You will need a quality pair of wire strippers to remove the insulation from the tips of the wires after the knot is tied. Stripping the wires before tying can sometimes lead to the copper strands fraying or breaking during the knot-tying process.
3. Screwdriver
A flathead or Phillips head screwdriver is required to secure the wires to the terminal screws once the knot is seated.
4. Housing/Plug Shell
The Underwriter’s Knot is designed to sit inside a cavity. Ensure the housing you are using has sufficient space to accommodate the bulk of the knot without pinching the insulation.
5. Considerations for Outdoor Rope Techniques
If you are practicing this as part of a broader study of rope knots, you can use 2mm or 3mm accessory cord (paracord) to simulate the two conductors. This is an excellent way for beginners to visualize the "interlocking loop" structure of the knot before moving to stiffer electrical wire.
How to Tie Underwriter’s Knot?
To ensure maximum safety and compliance with historical safety standards, follow these steps exactly as prescribed.
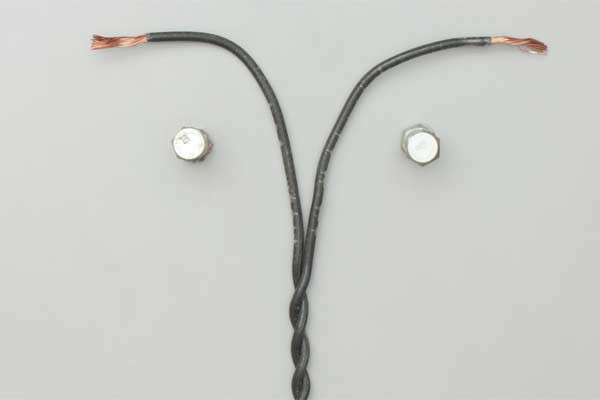
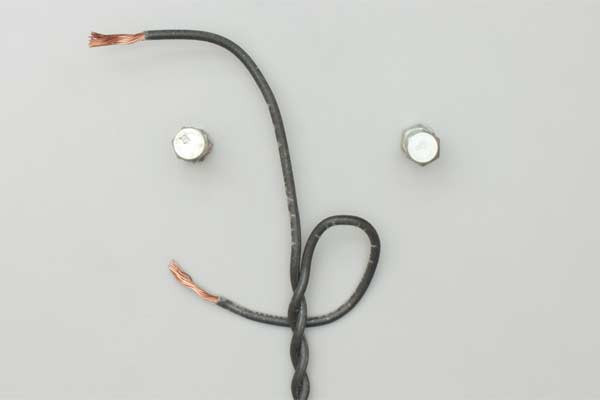
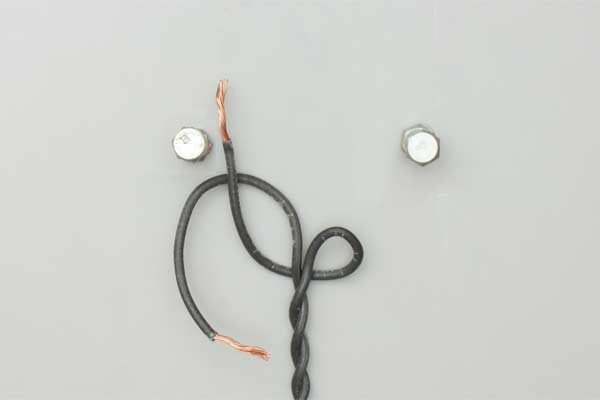
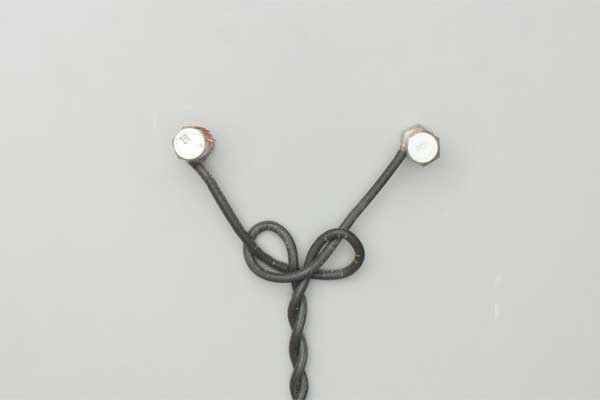
- Form a loop using the first wire.
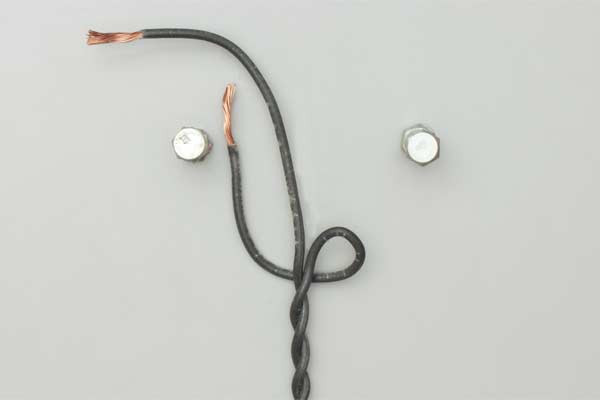
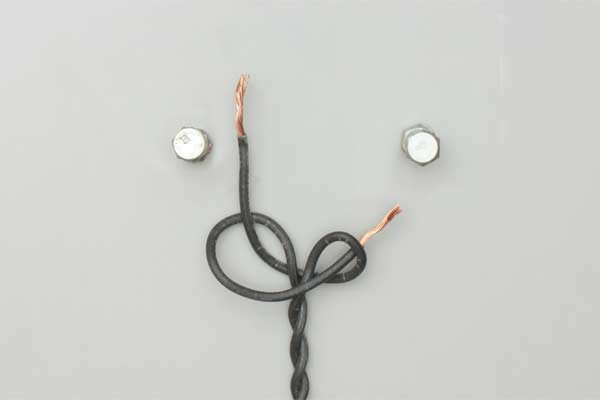
- With the second wire, form a loop around the first and pass the tail through its loop.
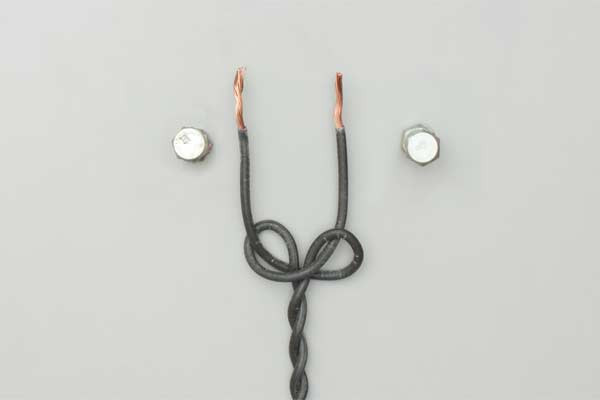
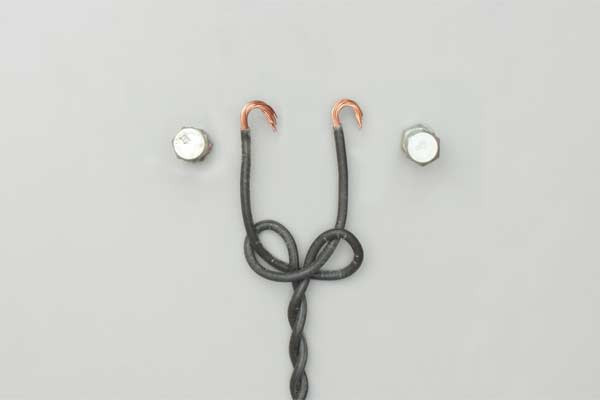
- Attach the wires to their terminals.
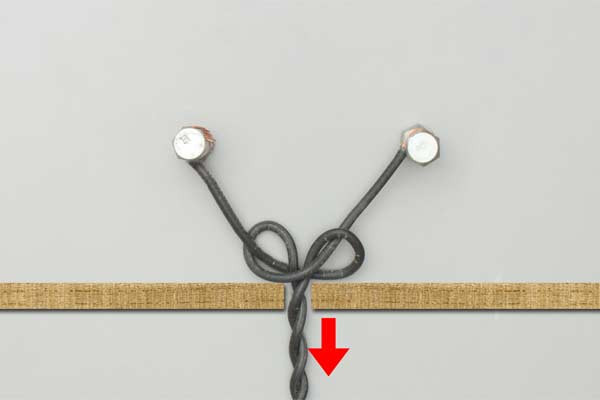
- Strain on the cable is now taken by the knot.
Note: When seating the knot, ensure it is pulled tight enough to be compact, but not so tight that it damages the internal copper strands of the wire.
Common Mistakes to Avoid
Even a simple knot can fail if executed poorly. When dealing with electricity or any tension-bearing system, precision is non-negotiable.
- Crossing the Wires Incorrectly: The beauty of the Underwriter’s Knot is its symmetry. If the loops are not intertwined correctly, the knot will be bulky and off-center, making it difficult to fit the housing back on.
- Stripping Too Much Insulation: If you strip the insulation too far back, the bare copper might touch within the knot itself once it is tightened. This creates a high risk of a short circuit. Only the tips that wrap around the terminal screws should be bare.
- Neglecting the "Seat": After tying the knot, you must pull the main cord so that the knot "seats" firmly against the base of the plug or socket. If there is a gap, the knot won’t take the strain, defeating its entire purpose.
- Using the Wrong Cord Type: This knot is specifically for two-conductor cords. Trying to force a three-conductor (grounded) cable into this configuration is often impossible and unsafe. For three-conductor cables, mechanical cord grips are usually required instead.
- Ignoring Wire Fatigue: If you tie and untie the knot repeatedly on the same section of wire, the copper inside can become brittle and snap. Always use a fresh section of wire if you are practicing.
Related Knots and Splicing
Broadening your knowledge of rope knots and outdoor rope techniques provides a well-rounded skill set for any technical specialist. Here are a few related knots that share functional similarities with the Underwriter’s Knot:
- Figure-Eight Knot: A fundamental stopper knot in climbing and sailing; it is bulkier than a standard overhand knot and prevents a rope from slipping through a hole or a belay device.
- Bowline Knot: Known as the "King of Knots," it creates a secure, non-slip fixed loop at the end of a rope, essential for rescue operations and securing loads in the outdoors.
- Clove Hitch: A quick-to-tie binding knot used to secure a rope to a post or spar; it is a staple in pioneering and setting up temporary shelters or gear lines.
- Overhand Knot: The simplest form of a stopper knot, used as a base for many other complex knots, though it can be difficult to untie after being heavily loaded.
- Sheet Bend: Used for joining two ropes of different diameters together, making it a vital "joining" knot for various outdoor and survival scenarios.
Final Words
The Underwriter’s Knot is a perfect example of how specialized rope knots can serve a critical safety function in our daily lives. While it may lack the adventurous flair of a knot used on a mountain peak, its role in preventing electrical hazards makes it an essential skill for any DIY enthusiast, homeowner, or technical specialist.
By mastering the "loop-around-loop" technique, you ensure that the mechanical strain of a pulled cable is handled by the knot’s geometry rather than the electrical connection. This simple act of foresight can prevent equipment damage and improve the longevity of your tools. Whether you are exploring outdoor rope techniques or refining your workshop skills, remember that the best knot is the one that is tied correctly, every single time.
Stay safe, stay secure, and keep practicing your cordage craft.
[content]
