In the world of mountaineering, search and rescue, and tactical outdoor applications, the reliability of your gear is non-negotiable. While high-tech carabiners and dynamic ropes often get the spotlight, the integrity of your system frequently relies on the humble knot. Among the most essential rope knots in any specialist’s arsenal is the Water Knot.
Known for its incredible strength when joining flat materials, the Water Knot is the industry standard for creating slings and runners. Whether you are a weekend hiker or a professional rigger, understanding the mechanics, applications, and limitations of this knot is vital for safety and efficiency in the field.
In this comprehensive guide, we will explore the nuances of the Water Knot, provide the exact technical steps for tying it, and discuss the safety protocols required to ensure your outdoor rope techniques are up to professional standards.
Alternative Names: Tape Knot, Ring Bend, Grass Knot, Overhand Follow-Through.
What Is a Water Knot?
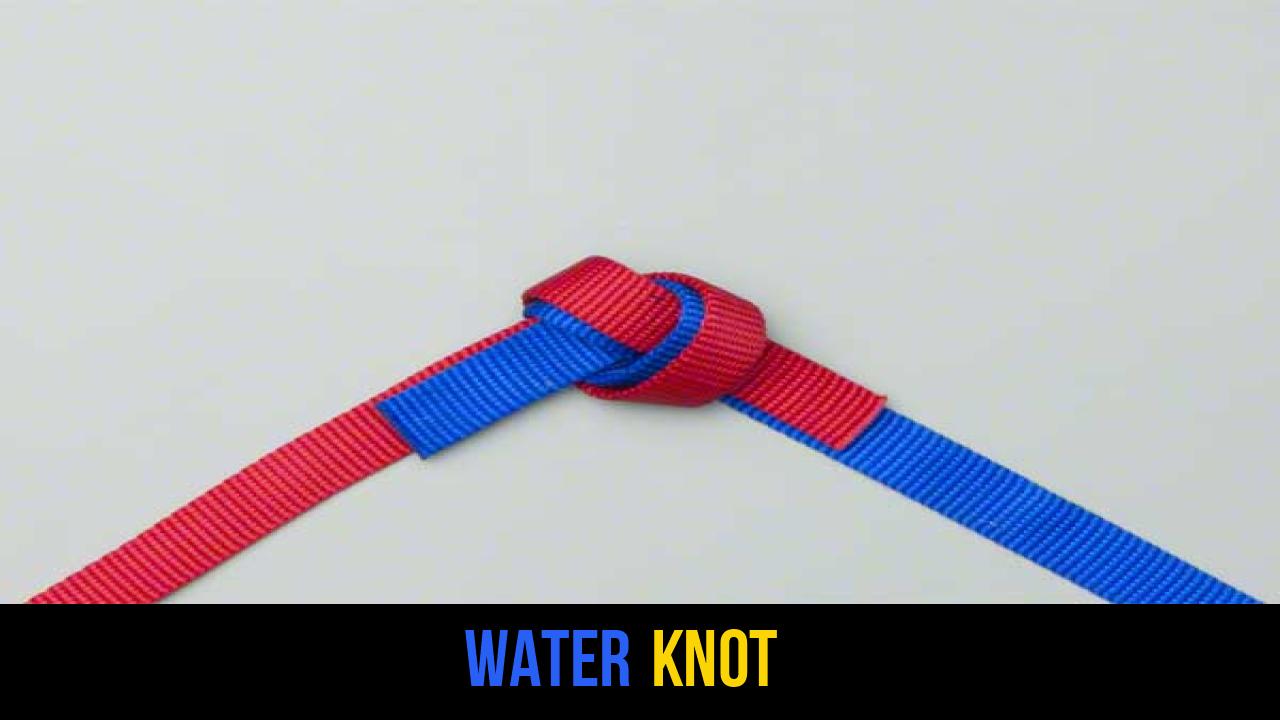
The Water Knot is a specialized bend used primarily to join two ends of webbing or flat straps together. While it can be used on round cordage, its structural design is optimized for the surface area of flat nylon or polyester webbing. Historically, it was used by climbers to create "runners" or "slings" from bulk webbing, a practice that remains common today for creating custom-length anchors.
Practical Applications
- Climbing Slings: Converting a length of tubular webbing into a continuous loop for protection or anchors.
- General Utility: Joining broken straps on backpacks or securing heavy loads in a vehicle.
- Search and Rescue: Creating improvised harnesses or litters where traditional pre-sewn gear is unavailable.
- Rigging: Providing a high-friction connection that resists slipping under significant tension.
The beauty of the Water Knot lies in its simplicity. It is essentially an overhand knot tied with one end of the material, with the second end "tracing" the first in reverse. This creates a symmetrical, low-profile connection that sits flat against rock surfaces or gear, reducing the risk of snagging.
Materials and Tools Needed
Before practicing your outdoor rope techniques, it is crucial to select the right materials. Not all ropes or straps are compatible with the Water Knot.
Recommended Materials:
- Tubular Webbing: Usually 1-inch (25mm) nylon. This is the most common material for this knot.
- Flat Webbing: Often used in heavy-duty tie-downs or older climbing gear.
- Utility Cord: While the Water Knot can work on cord, a Double Fisherman’s knot is generally preferred for round ropes.
Essential Tools:
- Sharp Shears: For cutting webbing to the desired length.
- A Lighter or Heat Source: To sear the ends of synthetic webbing to prevent fraying.
- A Ruler/Tape Measure: To ensure you leave enough "tail" (at least 3 inches) for safety.
Note: Always inspect your webbing for "furring," UV damage, or chemical burns before tying. If the material feels stiff or looks faded, it is time to retire it.
How to Tie a Water Knot?
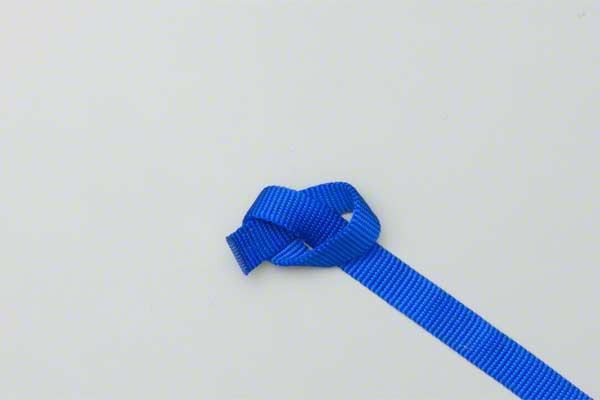
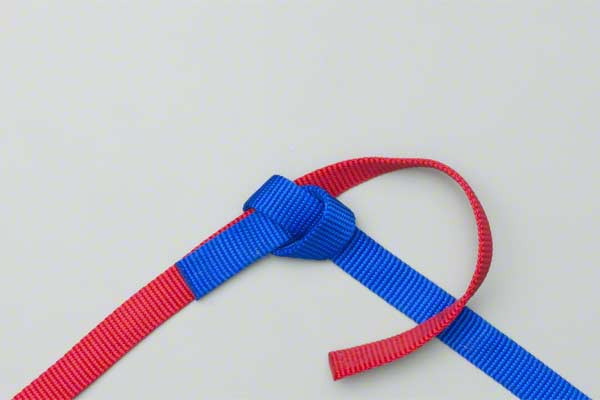
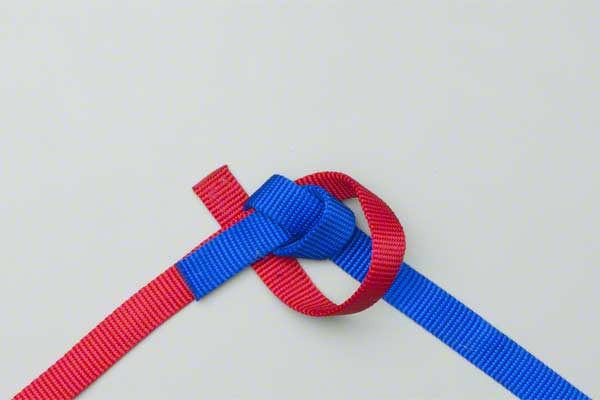
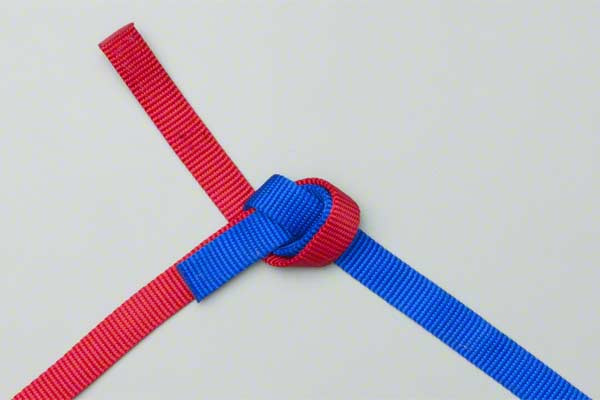
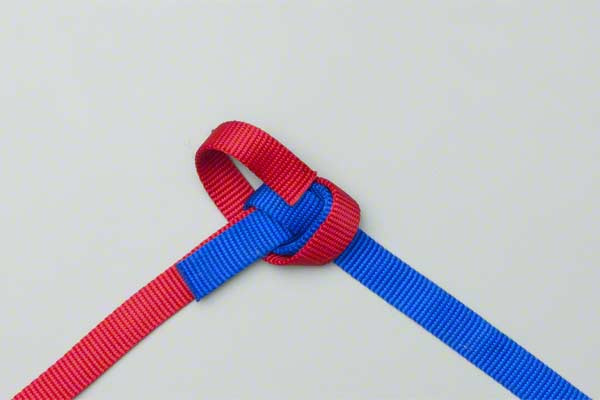
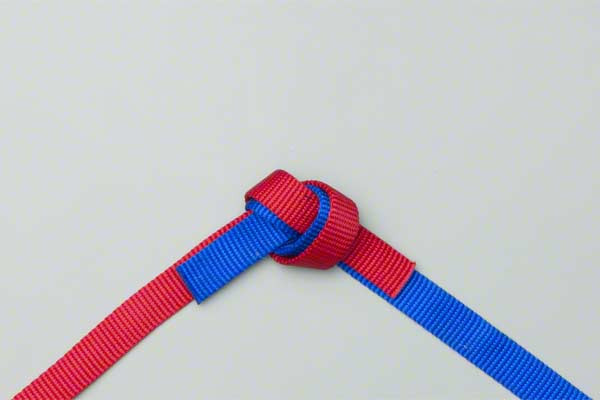
To ensure maximum safety and strength, follow these instructions exactly. The Water Knot must be dressed properly—meaning the straps should lie flat against each other without twists inside the knot.
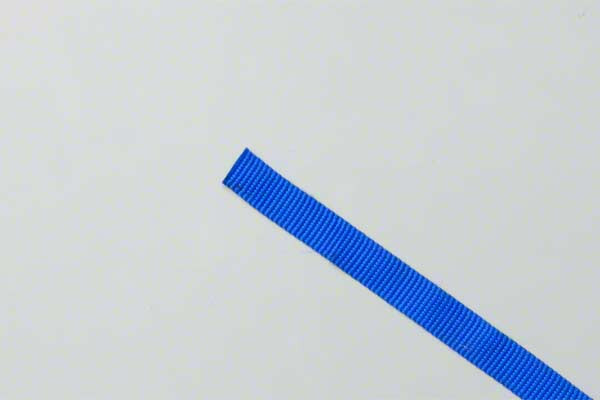
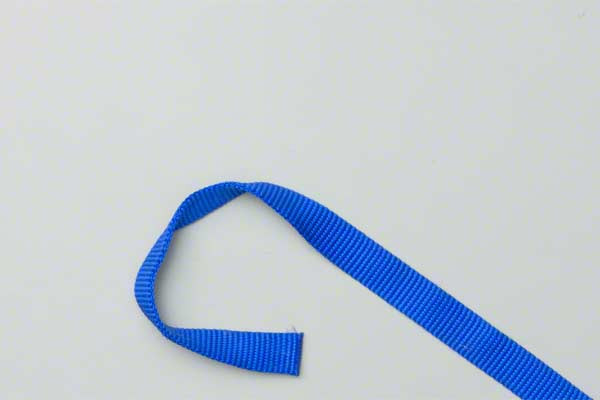
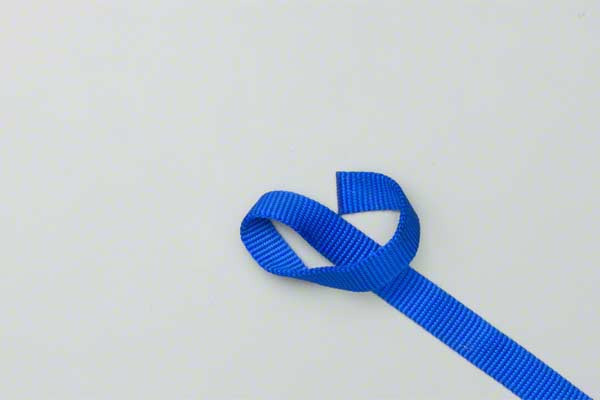
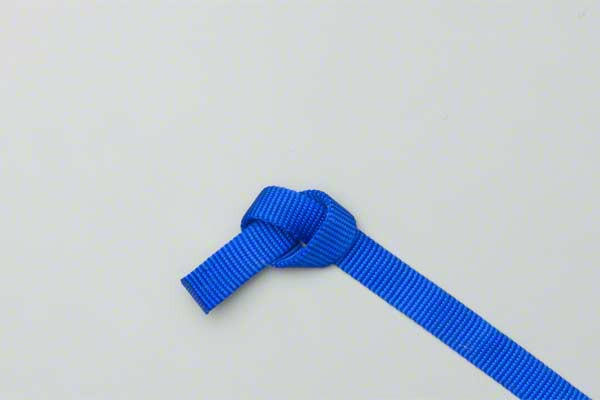
- Tie a loose overhand knot in the end of the strap.
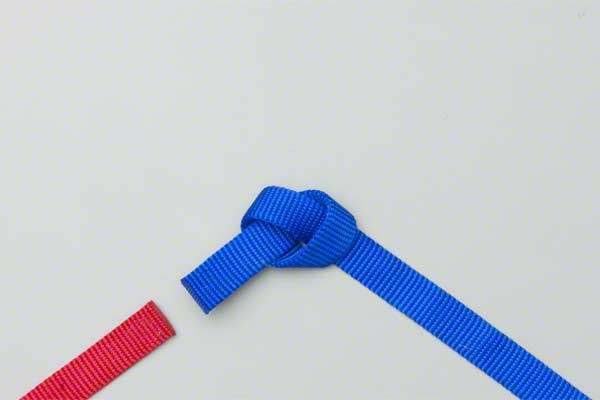
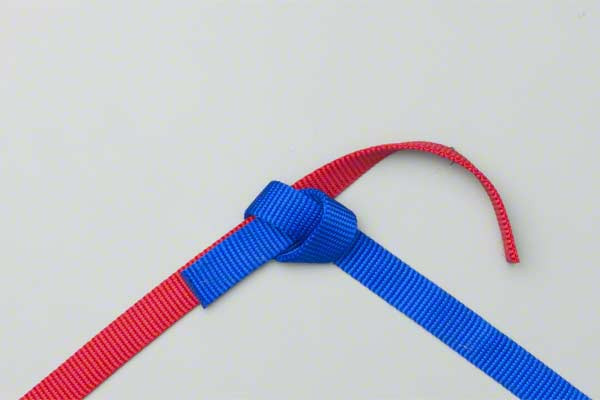
- Thread the other strap in the reverse direction following the exact path of the first overhand knot.
- Pull the knot tight.
Common Mistakes to Avoid
Even though the Water Knot is simple, errors in execution can lead to catastrophic failure. Because webbing is slick, this knot is prone to "creeping" over time.
1. Short Tails
This is the most dangerous mistake. Under repeated loading and unloading (cyclic loading), the ends of the webbing can slowly work their way back into the knot.
- The Fix: Always leave at least 3 to 4 inches (7-10 cm) of tail extending from the knot.
2. Tying with Mismatched Materials
Attempting to join a very thick strap to a very thin cord using a Water Knot can cause the thinner material to slice through the thicker one under load, or simply slip out.
- The Fix: Use the Water Knot primarily for joining webbing of the same width and thickness.
3. Failure to "Dress" the Knot
If the webbing is twisted inside the overhand structure, the pressure will not be distributed evenly. This reduces the breaking strength of the material.
- The Fix: Before you pull the knot tight, manually flatten the layers of webbing so they stack perfectly like two pieces of tape.
4. Forgetting to Load-Test
A Water Knot can look correct but still be loose enough to shift.
- The Fix: Once the knot is tied, use your body weight or a heavy pull to "set" the knot. Professionals often recommend re-tightening the knot after its first few uses.
Related Knots and Splicing
Expanding your knowledge of rope knots allows you to choose the right tool for the specific job. Here are several knots related to the Water Knot in function or form:
- Double Fisherman’s Knot: The gold standard for joining two round ropes together; highly secure and permanent.
- Figure-Eight Follow-Through: Primarily used to tie a climber into a harness; it is easy to inspect visually.
- Beer Knot: A specialized webbing knot where one end is tucked inside the tubular webbing of the other end.
- Square Knot (Reef Knot): A simple knot for joining two ropes, but unlike the Water Knot, it is not safe for critical loads.
- Prusik Knot: A friction hitch used to climb up a rope; essential for self-rescue in outdoor rope techniques.
The Science of the Water Knot: Why It Works
The Water Knot relies on the principle of high-surface-area friction. Because webbing is flat, the overhand "wrap" creates a significant amount of contact between the two pieces of material. When tension is applied, the outer wrap constricts the inner wrap, locking the two ends in place.
However, modern research in outdoor rope techniques has shown that certain materials, like Dyneema or Spectra, are too slick for a standard Water Knot. These high-modulus fibers require specialized knots or sewn "bar-tack" terminations. For standard Nylon webbing, however, the Water Knot remains a reliable choice, provided the user performs regular inspections.
Maintenance and Inspection
If you leave a Water Knot tied in a piece of gear for a long period, it can become "welded." This means the fibers have compressed so tightly that the knot is nearly impossible to untie. While this makes the knot secure, it also makes it difficult to inspect the hidden parts of the webbing for grit or internal wear. Specialists recommend untying, cleaning, and re-tying your webbing loops at the start of every season.
Final Words
The Water Knot is a cornerstone of outdoor rope techniques. Its ability to turn a simple length of webbing into a life-saving tool makes it indispensable for climbers, hikers, and rescue professionals alike. By mastering the simple three-step process—tying a loose overhand, threading in reverse, and pulling tight—you gain a versatile skill that enhances your self-reliance in the wilderness.
Remember: the strength of any knot is only as good as the person who ties it. Practice frequently, always leave long tails, and never hesitate to double-check your work. Whether you are rigging a haul system or simply securing gear to a roof rack, the Water Knot is a reliable partner in your outdoor adventures.
Summary of Best Practices:
- Use only on compatible webbing.
- Ensure the knot is "dressed" flat.
- Leave a minimum of 3-inch tails.
- Regularly inspect for "creep" and wear.
By integrating these rope knots into your technical skill set, you ensure that your gear is prepared for the rigors of the great outdoors. Stay safe, stay prepared, and keep practicing your craft.
